Description
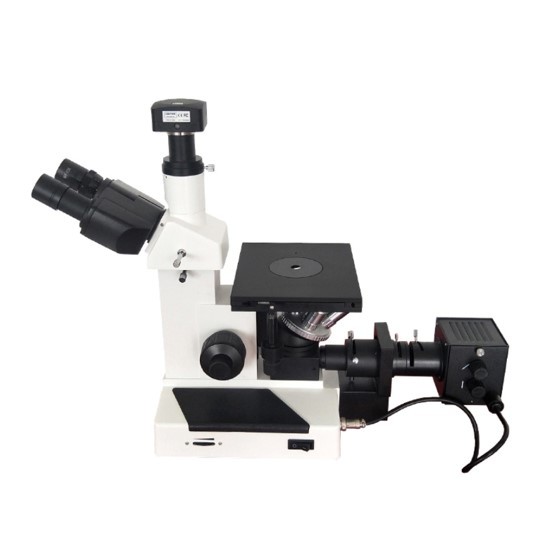
The RAYTEK-MT-FX-41M Research Grade Three Eyepiece Inverted Metallurgical Microscope adopts a newly designed infinite distance optical system, which can be widely used as an inverted microscope for research on casting, smelting, heat treatment, raw material inspection or material processing analysis. This machine comprehensively covers various observation methods such as bright field, dark field, simple polarization, differential interference, etc., to meet various research needs.
Comfortable and simple operating mode
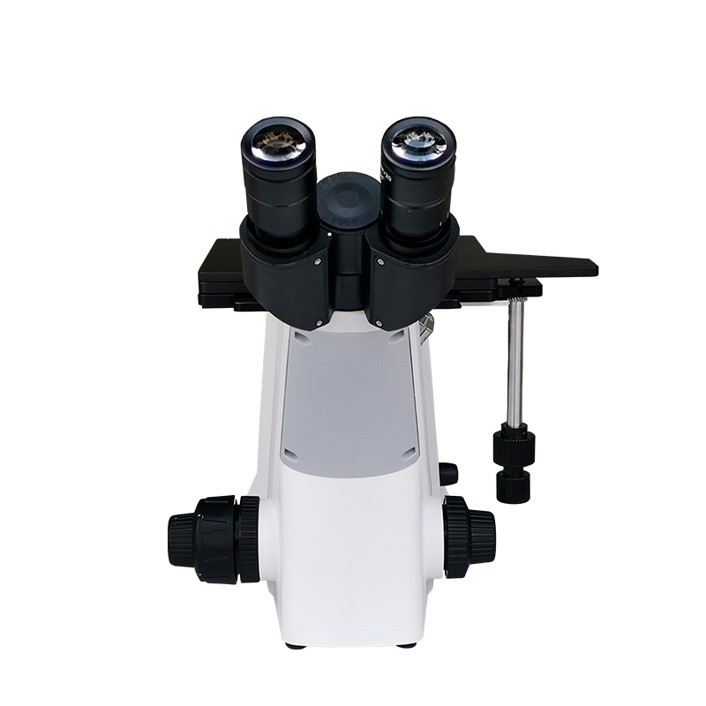
To meet the long-term observation needs of users, the RAYTEK-MT-FX-41M adopts a low hand operation mode and is equipped with a 360 ° rotating binocular observation tube, fully conforming to the ergonomic observation mode.
Stable and thoughtful exterior design
The RAYTEK-MT-FX-41M body is made of all metal casting, and the surface is treated with anti-corrosion and wear-resistant technology to ensure quality and stability. Make full use of the built-in space of the body to place instrument disassembly tools, which are universal for disassembling various main parts of the instrument, practical and easy to store.
Front magnification display function
The front objective lens magnification display function displays the current magnification directly in front of the instrument through the built-in magnification sensor, making research work more convenient.
New intelligent ECO system
Add an ECO infrared sensing system with the concept of environmental protection and economy. When the microscope is not operated for a long time, the system will automatically turn off or turn back on to save energy consumption.
|
Standard configuration |
Model |
|
|
Part |
Configuration |
MT-FX-41M |
|
Optical system |
Infinite chromatic aberration correction optical system |
· |
|
Observing tube |
Three-Eyepiece Observation Tube with 45° Inclination, Hinged Assembly Rotatable 360°, Fixed Eyepiece Tube, Interpupillary Distance Adjustment Range of 50-75mm, Two-Position Light Splitting Ratio: Binocular : Triocular = 100:0 or 0:100 |
· |
|
Ocular |
High eye point, large field of view, flat field eyepiece PL10X/22mm, adjustable visual acuity. |
· |
|
Objective |
Infinite long-distance bright and dark field objective: LMPL5X/0.15BD DIC WD9.0 |
· |
|
Infinite long-distance bright and dark field objective: LMPL10X/0.30BD DIC WD9.0 |
· |
|
|
Infinite long-distance bright and dark field objective: LMPL20X/0.45BD DIC WD3.4 |
· |
|
|
Infinite long distance half complex achromatic objective: LMPLFL50X/0.55 BD WD7.5 |
· |
|
|
Converter |
Internal positioning 5-hole light dark field converter (with DIC slot), built-in magnification sensor |
· |
|
Rack |
Reflective bright and dark field gold camera holder, using low hand position coarse adjustment coaxial, coarse adjustment stroke 9mm, focal plane up6.5mm, downward 2.5mm, fine adjustment accuracy 0.002mm, with elastic adjustment hand-wheel to prevent slipping |
· |
|
Equipped with a light dark field switching device, with a variable field aperture and aperture stop, and adjustable center; Equipped with color filter slot and polarizing device slot, light source brightness indicator strip, infrared sensing and objective magnification display function |
· |
|
|
Stage |
Three layer mechanical mobile platform, platform size: 240 (W) × 250 (L), movement range: 50 ×50mm, bidirectional track drive, right-hand low position control. The center hole of the metal loading platform is 12mm. |
· |
|
Lighting System |
Adopting an external wide voltage transformer, input 100-240V, output 15V13.4A,12V100W halogen lamp, continuously adjustable brightness |
· |
|
Polarized Attachment |
Polarizing mirror insert board, fixed analyzer insert board, 360 ° rotating analyzer insert board |
· |
|
Filter |
LBD color filter (diameter 32mm). |
· |
|
Optional configuration |
||
|
Component |
Configuration |
|
|
Ocular |
High eye point, large field of view, flat field eyepiece PL10X/22mm, adjustable visual acuity, with micrometer |
O |
|
High eye point, large field of view, flat field eyepiece PL15X/16mm, adjustable visual acuity |
O |
|
|
Objective |
Infinite long distance half complex achromatic objective: LMPLFL100X/0.80 BD WD2.1 |
O |
|
Differential interference |
DIC differential interference component |
O |
|
Metallographic analysis system |
FMIA2024 genuine metallographic analysis software and micrometer. |
O |
|
Imaging device |
12 million and 20 million pixel Sony chip camera devices. |
O |
|
Adapt mirror interface |
0.5X, 1X adapter lens interface |
O |
|
Computer |
HP |
O |
|
Name |
Function |
|
FCL-RS image measurement software |
FCL-RS image measurement software supports multiple international languages and has functions such as image capture, image measurement (including calculation of perimeter, width, radius, circumference, and angle), image processing (automatic exposure, white balance, black balance, etc.), panoramic automatic stitching, video EDF depth expansion, video overlay time, scale, data measurement, and accurate layer fusion of images. It can also save multiple image file formats. The camera is available in pixel sizes of 20 million, 12 million, and 5 million. |
|
FMIA2024 metallographic analysis software |
The FMIA2024 metallographic image analysis software system includes 150 categories and approximately 760 commonly used sub modules, covering common metallographic standards and meeting all requirements for metallographic analysis and inspection. The analysis of the microstructure of all materials, including grain size, non-metallic inclusions, steel microstructure, decarburization layer, gray iron, ductile iron, carbon steel spheroidization, etc., in addition to functions such as metallographic teaching, image measurement, national standard image library, and fixed magnification printing. Customize testing modules according to customer needs, such as enterprise standards, industry standards, etc. We can customize report templates for different enterprises. According to the implementation time of the National Standardization Committee standards, free software upgrades will be carried out. This software can be installed and run on Windows 10 and Windows 11 |
|
Weld penetration software |
Weld penetration software is a professional version of macro measurement software for weld penetration developed according to weld standards. The software has functions such as measuring the weld penetration depth of the inner weld, the weld penetration depth of the outer weld, the width of the inner weld, the width of the outer weld, the excess height of the inner weld, the excess height of the outer weld, the overlap of the inner and outer welds, the center offset of the inner weld, the center offset of the outer weld, the diameter and density of the pores. At the same time, macroscopic metallographic examination of welding seams can also be carried out for defects such as welding porosity, slag inclusion, cracks, incomplete penetration, incomplete fusion, and undercutting. Finally, the weld seam measurement report can be exported. Basic software functions:
•Professional measurement of weld
penetration depth (measuring the weld penetration depth inside the weld, the
weld penetration depth outside the weld, the weld width inside the weld, the
weld width outside the weld, the weld excess inside the weld, etc.);
|
|
lIt has functions such as fixed
magnification printing, geometric measurement, image acquisition, image
processing, and image stitching.
lWe can customize software report
templates and measurement functions according to customer needs.
|
|
|
Porosity software |
The porosity software is suitable for measuring and analyzing the porosity of all materials, and complies with VW50093 (the latest casting porosity inspection standard and method) and VW50097 (porosity standard) measurement and analysis. Basic functions::
lIt has functions such as image
acquisition, image processing, image stitching, geometric measurement,
hardware calibration, and report generation.
lIt can analyze the circumference,
area, major axis, minor axis, equivalent circle diameter, aspect ratio,
circularity, and other data of each pore.
|
|
Granular software |
The granularity software is suitable for analyzing and measuring different types of particles, and has multiple module functions to choose from. (Measurement of area, color extraction, clear and nearly circular particles, blurry particles, segmentation of non-circular adhesive particles, segmentation of circular adhesive particles, blurry misty particles, particles with voids in the middle, etc.) Basic functions::
lIt has functions such as image
acquisition, image processing, image stitching, geometric measurement,
hardware calibration, and report generation.
lIt can analyze the circumference,
area, major axis, minor axis, diameter, shape ratio, total number of
particles, average diameter, and other data of each particle.
|
Parts Name


